A guitar can look MINT, wear a serious set of pickups and still feel wrong the moment you play an open chord. Strings that fight back, buzzing around the middle frets, notes that sound sharp high up the neck - these are not always signs of a bad guitar. Often, they are signs that it needs attention. This guitar setup checklist helps you work through the essentials in the right order, whether you have just bought a first electric, brought home a rare used find or pulled an old favourite out of its case.
A setup is not a single adjustment. It is a balance between the neck, strings, nut, bridge and your playing style. Get one part wrong and it affects the next, so resist the urge to raise the saddles before checking the neck. Take your time, use the gauges you actually intend to play, and make small changes.
Before the guitar setup checklist begins
Start with the instrument at room temperature and tuned to concert pitch. If it has travelled through a cold delivery van, a hot rehearsal room or a damp loft, let it settle first. Wood moves with temperature and humidity, particularly on acoustic and hollow-body guitars, and a setup performed before it has acclimatised may not hold.
Fit a fresh, properly stretched set of strings in your preferred gauge. Moving from .009s to .011s on an electric, or fitting heavier phosphor bronze strings to an acoustic, changes the pull on the neck. That may call for a different truss rod setting and a fresh intonation check. There is no universally correct action either. A player digging into punk rhythm needs more clearance than someone with a light touch playing clean jazz lines.
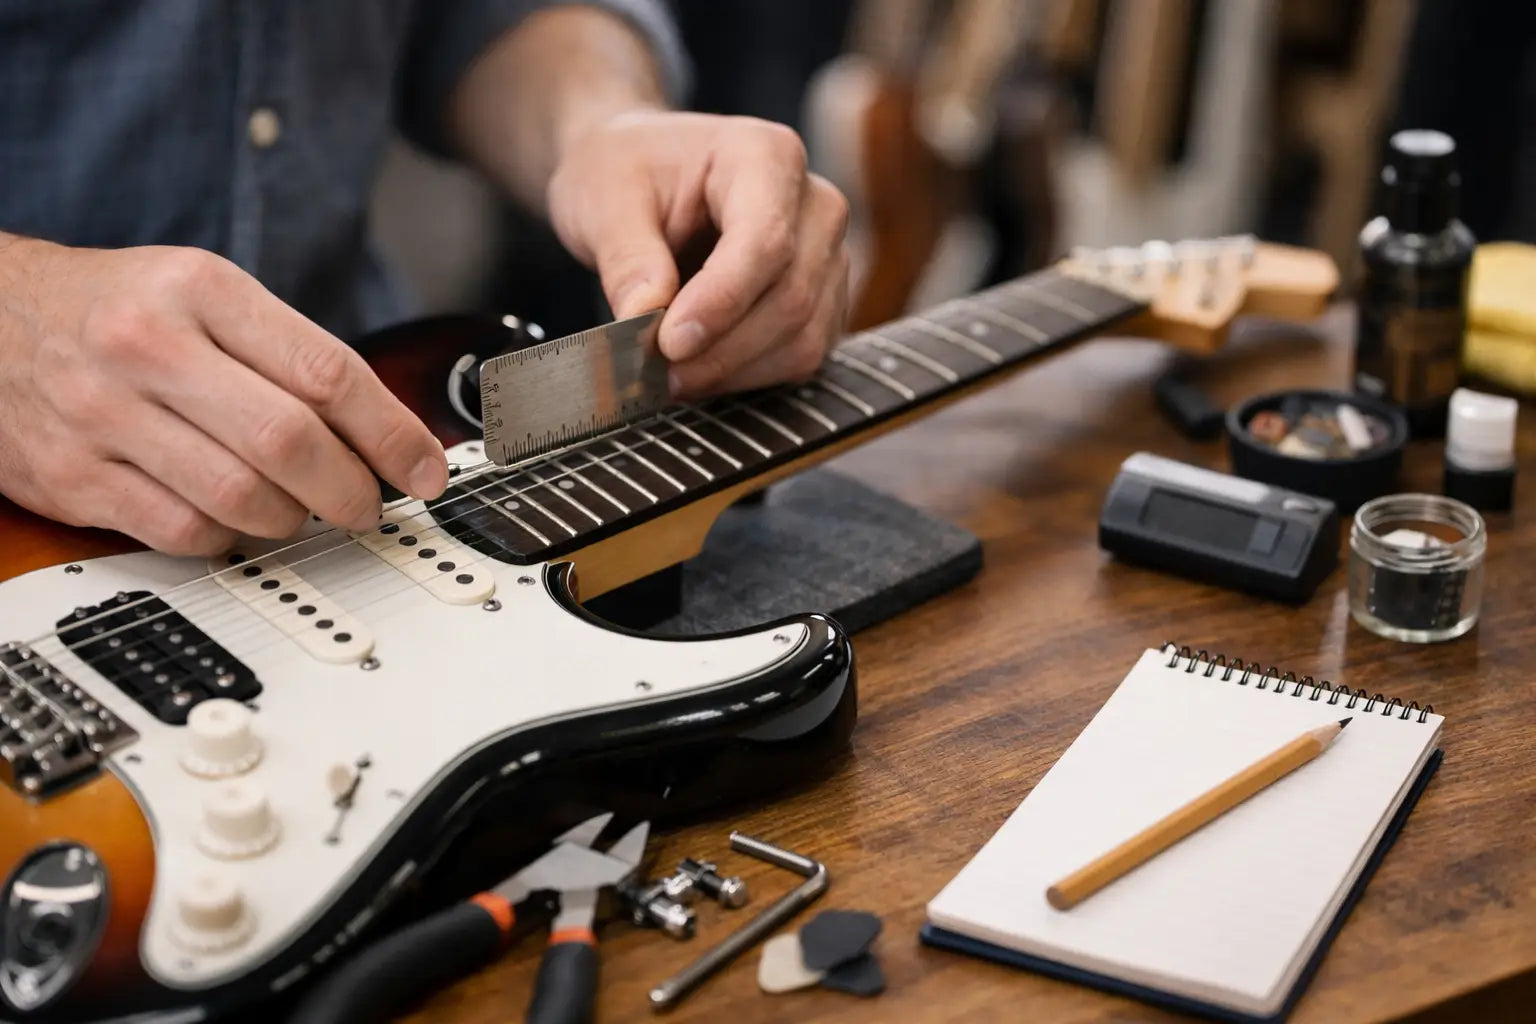
Gather a reliable tuner, a capo, feeler gauges, a suitable truss rod key, a small ruler that reads in millimetres and the correct screwdriver for the bridge. A clean cloth is useful too. If the guitar has an unfamiliar vintage bridge, a locking nut, a floating tremolo or visible structural damage, pause before adjusting anything. These instruments can be straightforward in experienced hands, but are not the ideal place to learn by force.
Guitar setup checklist: follow this order
1. Inspect the neck, frets and hardware
Sight down the neck from the headstock towards the bridge. You are looking for an obvious twist, a hump where the neck meets the body, lifted frets or an unusually severe bow. A little curvature is normal. A pronounced twist or loose fret is a repair issue, not something saddle height will cure.
Check that machine heads, strap buttons, bridge posts and jack sockets are secure. Do not overtighten screws in old or soft wood, especially on vintage instruments. Run a finger carefully along both sides of the fretboard. Sharp fret ends can appear when a guitar dries out, and they deserve attention before a long practice session becomes an uncomfortable one.
2. Set the neck relief
Relief is the small amount of forward curve that gives a vibrating string room to move. Too much relief makes the action feel high, particularly around the middle of the neck. Too little can create buzz across several frets, even when the bridge is set reasonably high.
Capo the first fret, hold down the lowest string at the last fret and measure the gap around the seventh or eighth fret. A light gap is normally the aim. Exact figures vary by guitar and player, but around 0.10 mm to 0.30 mm is a sensible broad working range for many electrics. Acoustics may need a little more, particularly if played hard.
Make truss rod adjustments in tiny increments - an eighth of a turn is plenty. Tightening generally reduces relief; loosening generally adds it. Retune, allow the neck a few minutes to respond, then measure again. If the nut feels seized, the rod has reached resistance or you are unsure which way it should move, stop. Forcing a truss rod can turn a routine setup into an expensive repair.
3. Check nut height before chasing bridge buzz
The nut governs how the guitar feels in first-position chords. If its slots are too high, open chords feel stiff and notes fretted near the nut can play sharp. If they are too low, you will hear a sitar-like buzz on open strings that disappears when you fret at the first fret.
A quick test is to fret each string at the third fret and look at the clearance above the first. There should be the faintest movement, not a large visible gap and not a string already touching the fret. Nut work is precise. Filing too deep cannot be undone without filling or replacing the nut, so this is one of the best jobs to leave to a workshop unless you have the correct files and some practice on a less precious instrument.
4. Adjust the action at the bridge
Now measure the string height at the 12th fret, from the top of the fret to the underside of the string. Many electric players begin around 1.5 mm on the high E and 2.0 mm on the low E, then adjust for feel. An acoustic often sits higher, perhaps around 2.0 mm and 2.5 mm respectively, but its ideal measurement depends heavily on neck angle, string gauge and how firmly it is played.
Raise or lower the bridge gradually and keep both sides balanced. On a tune-o-matic style bridge, alter the bass and treble posts a little at a time. On a Strat-style bridge, adjust individual saddles while preserving the fretboard radius. Play every fret on every string afterwards, both gently and with your normal attack. A trace of acoustic buzz that cannot be heard through an amplifier may be acceptable; a note that chokes out during a bend is not.
Floating tremolo systems need a little extra patience. Changing action or string gauge alters spring tension, which changes the bridge angle, which changes tuning. Keep the bridge level where its design requires it, make one change at a time and retune repeatedly. It is perfectly reasonable to ask for a professional setup if you would rather spend Saturday playing than balancing a tremolo.
5. Set intonation last
Intonation makes notes play in tune as you move up the neck. Tune the open string accurately, then compare the 12th-fret harmonic with the fretted 12th-fret note. If the fretted note is sharp, lengthen the string by moving its saddle away from the neck. If it is flat, shorten the string by moving the saddle towards the neck. Retune every time you move it.
Use a normal fretting pressure for this test. Pressing hard can pull a note sharp and make a correctly intonated guitar appear wrong. Also accept the limits of the instrument: standard fretted guitars are a compromise, and some open chords will never be mathematically perfect everywhere on the neck. The goal is convincing musical tuning where you play most.
6. Test the electronics and final feel
Plug into a clean amp setting and work through every pickup position, volume control and tone control. Listen for crackles, dropouts, excessive hum or a loose jack socket. Scratchy pots sometimes improve with proper contact cleaner, but do not spray random lubricants into the control cavity. Check the selector switch, output jack and battery compartment if the guitar has active pickups or an acoustic preamp.
Finish by testing the guitar as you use it: open cowboy chords, barre chords, single-note runs, big bends and notes high on the neck. Check tuning after bends and use the tremolo, if fitted. This final playing test matters more than chasing a number on a ruler. A setup should make you want to keep playing.
When a professional setup is the better call
Some problems sit beyond a home adjustment. Persistent buzzing in one area can point to uneven frets. Very high action on an acoustic can indicate a neck-angle issue. Cracks, lifting bridges, headstock repairs, worn frets, a twisted neck and stubborn electrical faults all deserve a proper assessment.
That is particularly true for collector-grade, vintage and unusual Japanese-made instruments. Their value is not just in originality but in preserving what is there. A careful setup can make a great used guitar feel properly yours without unnecessary replacement parts or irreversible work. At Chordplay Guitars, the workshop can handle anything from a straightforward restring and setup to fretwork and restoration when the instrument needs more than a turn of a screw.
Keep a note of your preferred string gauge, action and any small compromises that suit your style. The best setup is not the lowest one on paper. It is the one that stays in tune, responds to your hands and lets the guitar get out of the way of the next song.
Share:
How to Restring a Guitar Without the Faff
A Practical Guide to Vintage Guitar Grading